
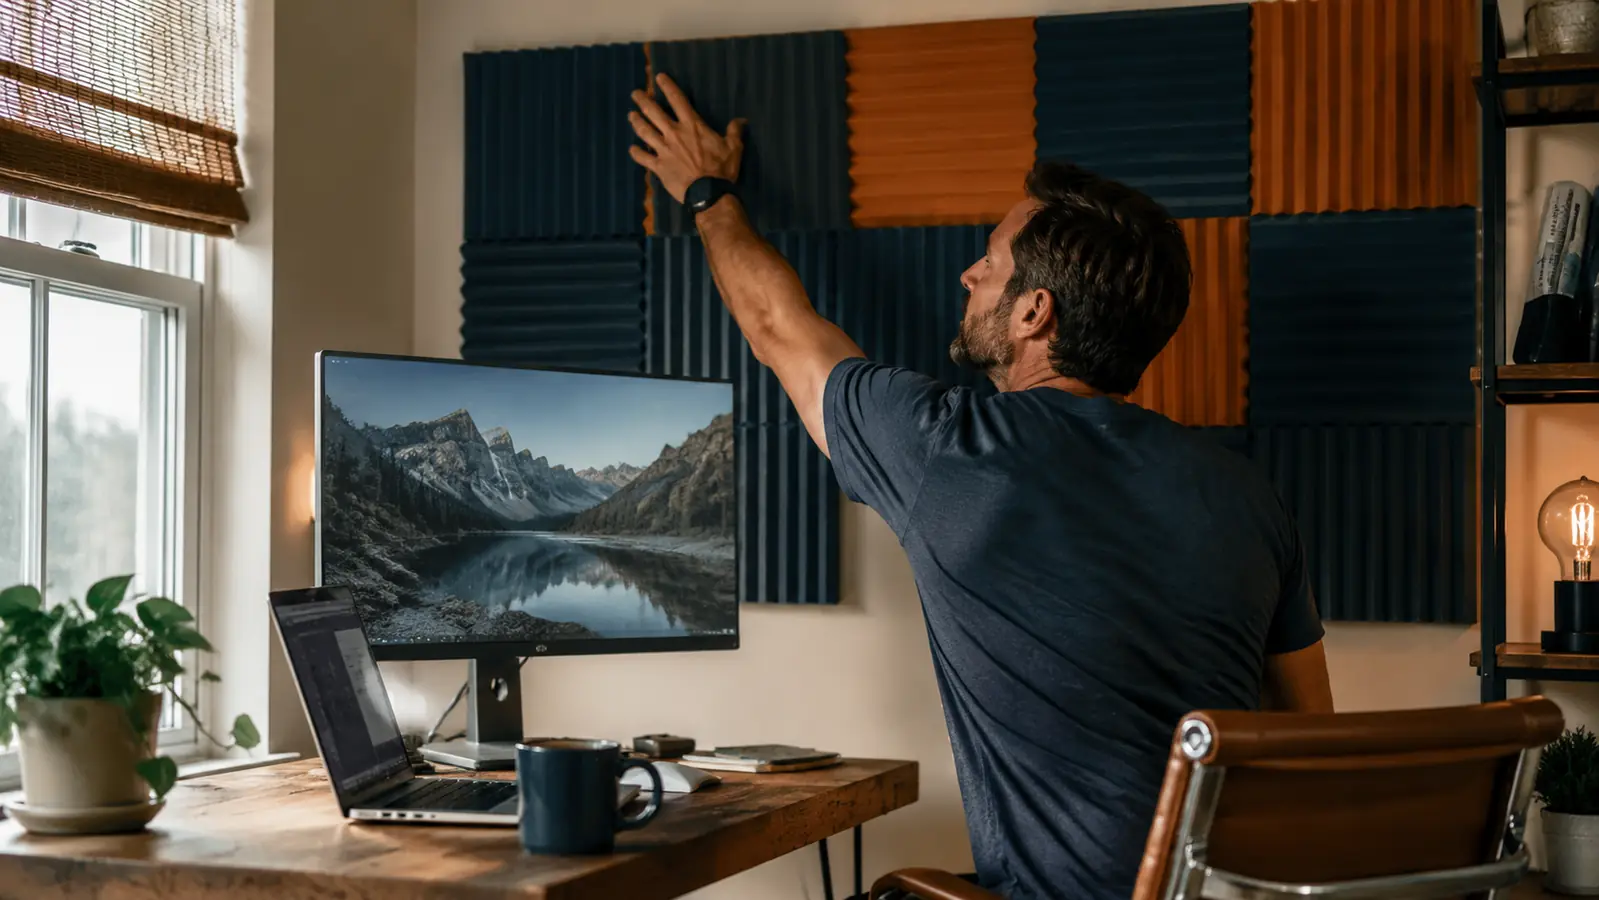
If every call sounds like you're talking from inside a shower stall, that's not your headset. That's your room. Hard walls, a bare floor, and a window or two bouncing sound back at your microphone will make even a decent laptop mic sound cheap and tinny, no matter how much you paid for it. The good news is you don't need a soundproof booth or a contractor to fix it. A stack of JBER acoustic foam panels, a rug, and a sealed door will get most spare-bedroom offices most of the way there. You just need to understand the difference between blocking noise and killing echo, because they're two different problems with two different fixes, and you need to tackle them in the right order so you're not spending money on the wrong one first. The piece that did the heaviest lifting on my budget was a pack of JBER acoustic foam panels, and I'll show you exactly where they matter most.
Most spare-bedroom and converted-closet offices have the same handful of issues: bare drywall on two facing walls, a hollow-core door that leaks every hallway conversation, and a hard floor that sends sound right back up at the microphone. None of that requires foam wall-to-wall or a premium acoustic treatment package. This guide is the order I'd actually work through in a real home office, starting with the cheapest fix that solves the most common complaint (echo on video calls) and working up from there to outside noise, doors, and a couple of free software tricks. The first three steps here usually run in the budget range combined, and most of it can be done in an afternoon without any tools beyond a tape measure and scissors.
Start With the Wall Behind Your Camera
Before you spend a dollar on anything else, treat the wall your microphone and camera are pointed at. A 12-pack of JBER acoustic foam panels covers roughly 12 square feet for well under budget pricing and takes about 20 minutes to install with the included adhesive strips, no drilling required.
Amazon Check Today's Price on Amazon →Step 1: Find Out What's Actually Bouncing Around Your Room
Before you buy anything, do the clap test. Stand in the middle of your office and clap once, sharply. In a treated room, the sound dies almost instantly, with barely a trace left over. In an untreated one, you'll hear a short, ringing tail, almost like a slap-back echo that hangs in the air for a beat too long. That tail is reflected sound bouncing off drywall, glass, and any other flat, hard surface in the room, and it's exactly what your microphone picks up and passes along to everyone on the call with you.
Walk the room and note every hard, parallel surface: bare drywall, a closet door, a window, a desk with nothing sitting on it. Two flat walls facing each other are usually the worst offenders, because sound bounces back and forth between them instead of getting absorbed by anything soft in between. That's your target zone, not the entire room. Trying to treat every square inch wastes money and effort. Finding the two or three worst offenders and fixing those gets you most of the improvement for a fraction of the cost, and it's the same principle a professional studio treatment would use, just scaled down to a bedroom budget.
Take thirty seconds to also check the room on a recorded voice memo. Talk normally for ten seconds, then play it back with headphones on. You'll hear the echo far more clearly through headphones than you do live in the room, since your brain filters out a lot of it in real time but a recording doesn't. This gives you a rough before-and-after baseline you can compare against once the panels are up, and it's a lot more useful than trying to judge improvement from memory alone a week later.
Step 2: Treat the Walls First, Not the Whole Room
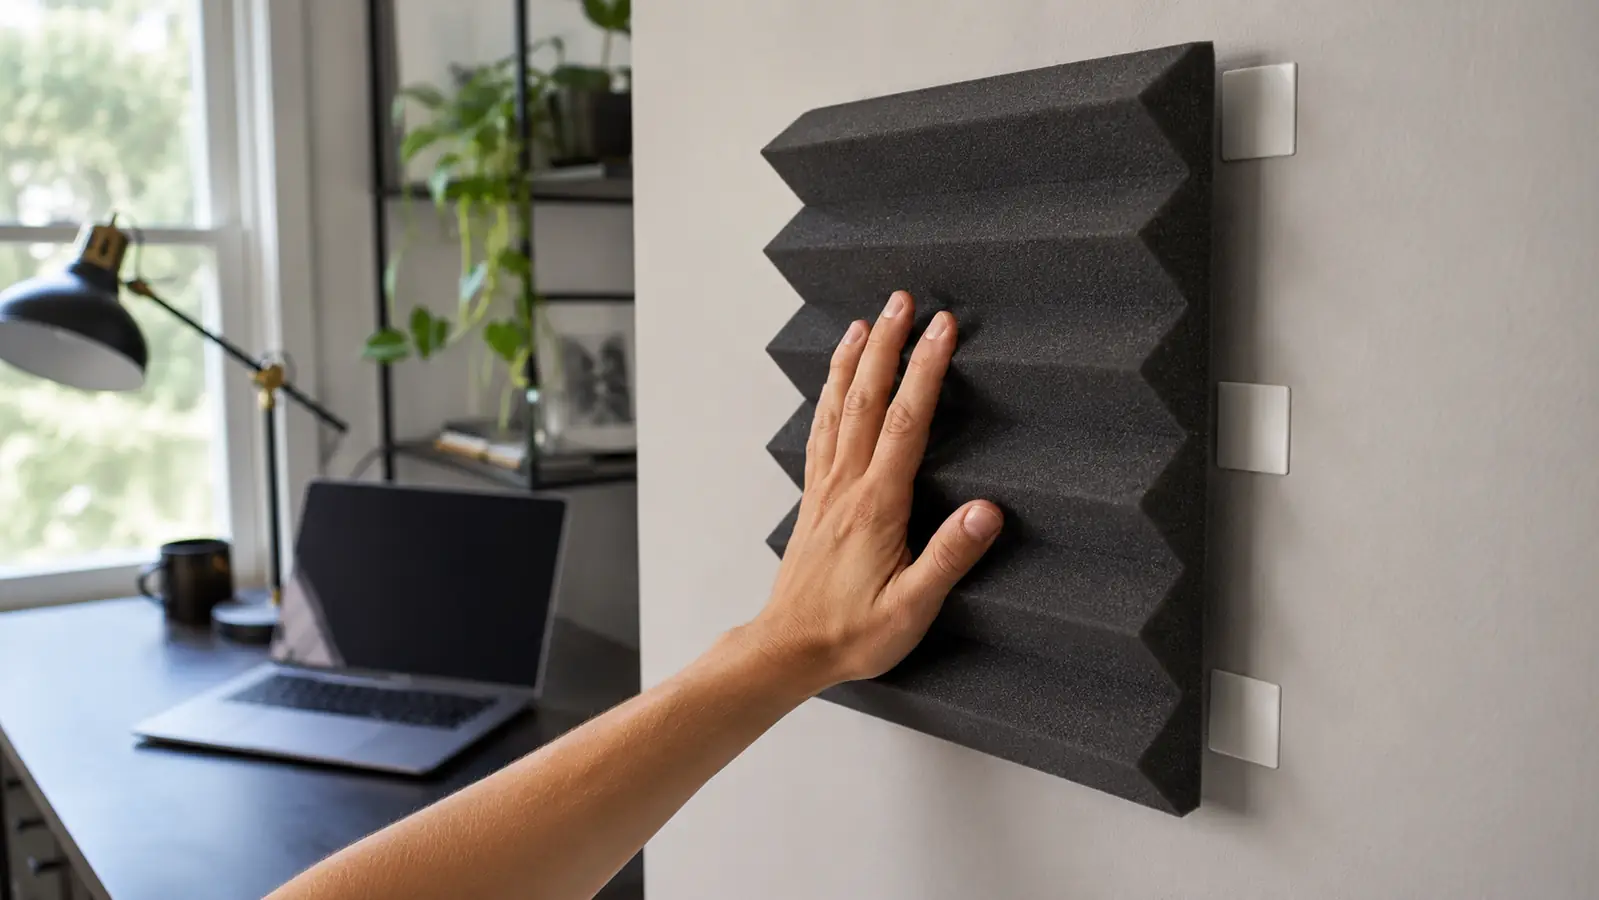
This is where most people overspend. You don't need a fully padded recording studio, you need to break up the two or three worst reflection points in the room. Acoustic foam wedge panels are built for exactly this. They're cheap per square foot, they stick on with adhesive squares so there's no drilling into a rental wall or patching holes later, and the wedge-cut shape scatters sound in multiple directions instead of letting it bounce straight back the way a flat surface does.
Focus the panels on the wall directly behind your monitor, since that's the surface facing your microphone during calls, and on any wall directly opposite it if the room is small enough that the two are bouncing sound at each other. A dozen 12 by 12 inch panels arranged in a loose grid, staggered rather than pressed into one tight solid block, covers enough surface area to noticeably shorten that echo tail from the clap test. You're not trying to cover every inch of drywall. You're trying to interrupt the bounce at the points where it's worst.
Skip the ceiling for now unless you're working in a room with unusually high, hard surfaces, like a converted garage or a room with vaulted ceilings. Most home offices get roughly 80 percent of the achievable improvement from wall panels alone, and ceiling treatment is a project for later if you still hear noticeable ring after everything else in this guide is done. Spend the first round of money on walls, not the ceiling, and reassess with another clap test before buying anything else.
Step 3: Break Up Every Hard, Flat Surface You Can
Once the worst reflection points are handled with panels, look at what's left in the room that's still hard and flat. A bare hardwood or laminate floor reflects almost as much sound as a wall does, and it's the surface most people forget to think about. A cheap area rug, even a small one placed just under your desk chair and the floor space in front of it, absorbs a surprising amount of that floor bounce at a budget-friendly price, and it does double duty by muffling chair-roll and foot-tap noise your mic would otherwise pick up.
A bookshelf loaded with actual books does more acoustic work than most people give it credit for, since the uneven, broken-up surface scatters sound the same way foam does, just for free if you already own the books and have a wall to put it against. Heavy curtains over a window do a similar job to a foam panel if you'd rather not put anything directly on the glass, and they double as light control for video calls where glare is as much of an issue as echo. None of this needs to be expensive. It just needs to replace flat and hard with soft and irregular, wherever you can manage it around the room.
Step 4: Stop Noise at the Door
Echo is one problem. Outside noise leaking in from the hallway, kitchen, or street is a separate one entirely, and it gets fixed differently. Most interior doors are hollow-core, which means they're basically two thin sheets of material with air in between and nothing to actually stop sound. Noise walks right through them like they're barely there, and the half-inch gap under the door is often a worse leak point than the door slab itself.
A self-adhesive foam door seal kit, the same kind sold for drafty exterior doors, costs a few dollars and closes that under-door gap in about five minutes. If the door itself is the weak point, a heavy blanket or moving pad hung over it during calls makes a real, noticeable difference and costs nothing if you already have one sitting in the garage or closet. This one fix solves the barking dog, the kids in the next room, or the roommate's TV problem that foam panels on the wall will never touch, because that's airborne noise coming through a gap, not echo bouncing around inside your own room.
Step 5: Back It Up With Software and Mic Placement
Physical treatment does the real work, but a few settings tweaks stack on top of it for free and take less than five minutes to set up. Zoom, Teams, and Google Meet all have a background noise suppression setting buried in audio preferences, and turning it to "high" or "aggressive" cleans up residual hum, keyboard clatter, and HVAC noise your room treatment won't catch on its own. It's not a replacement for fixing the room, since it can make voices sound slightly processed if pushed too far, but it's a useful second layer once the physical fixes are in place.
Mic placement matters more than most people expect, too. Moving your microphone or headset boom closer to your mouth and away from the center of the room reduces how much reflected sound it captures in the first place, since it picks up more direct voice signal and less bounced echo the closer it sits. Combined with the wall treatment from Step 2, this combination usually gets a formerly echoey room sounding clean and professional on a recorded call, without anyone on the other end knowing you're working out of a converted spare bedroom.
What Else Helps
If outside noise is still getting through after sealing the door, a white noise machine set to a low, steady tone near the loudest source, whether that's a shared wall or a window facing the street, can mask what's left without adding any more physical treatment to the room. It won't stop the noise at its source the way sealing a gap does, but it flattens the distraction so it's far less noticeable on calls and easier to tune out during focused work. Rearranging your desk so your back isn't facing a window also helps more than people expect, since glass reflects sound almost as badly as bare drywall does and puts you directly in the path of the bounce every time you speak.
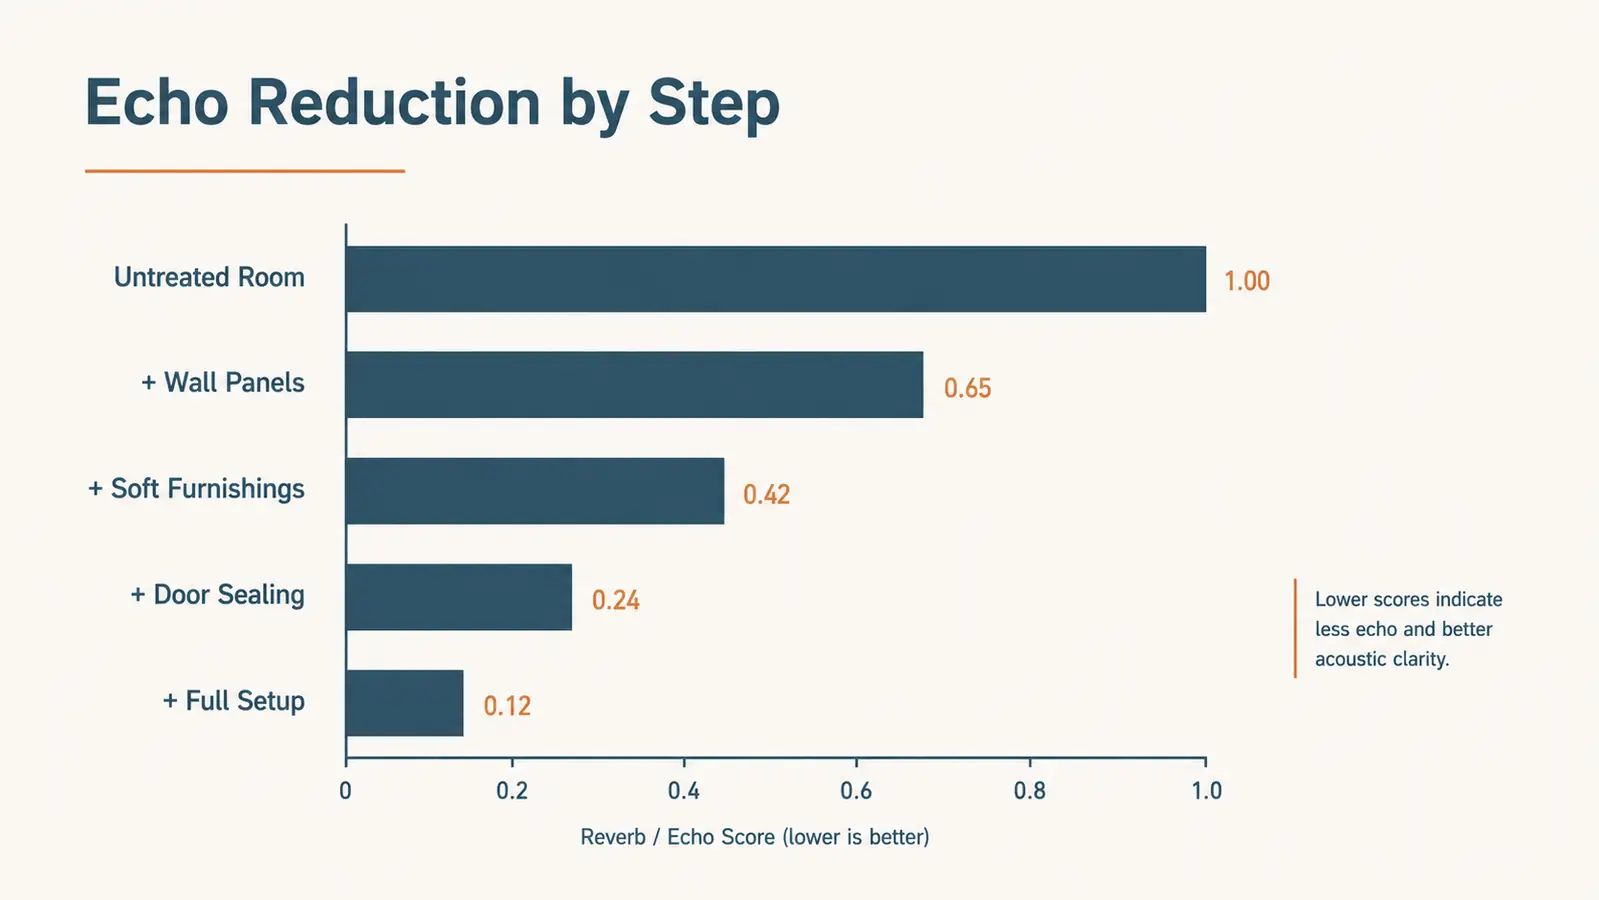
It's also worth doing the clap test again once every step is done, and comparing it to that voice memo you recorded back in Step 1. Most people are surprised at how much of a difference a dozen foam panels, a rug, and a sealed door make together, even though none of it individually looks like much on its own. The changes compound. A room that goes from a noticeable ringing echo to almost none of it usually gets there through four or five small, cheap fixes stacked on top of each other over the course of a single weekend, not one expensive project spread out over months.
You're not building a recording studio. You're just giving the sound somewhere to go besides straight back into your microphone.
The Cheapest Fix Is Still the Wall Panels
If you only do one thing from this guide, treat the wall behind your monitor. It's the single fastest, cheapest way to shorten echo on every call you take from that desk going forward, and everything else in this guide builds on top of it.
Amazon Check Today's Price on Amazon →